How to Plan an Electric Charger Installation?
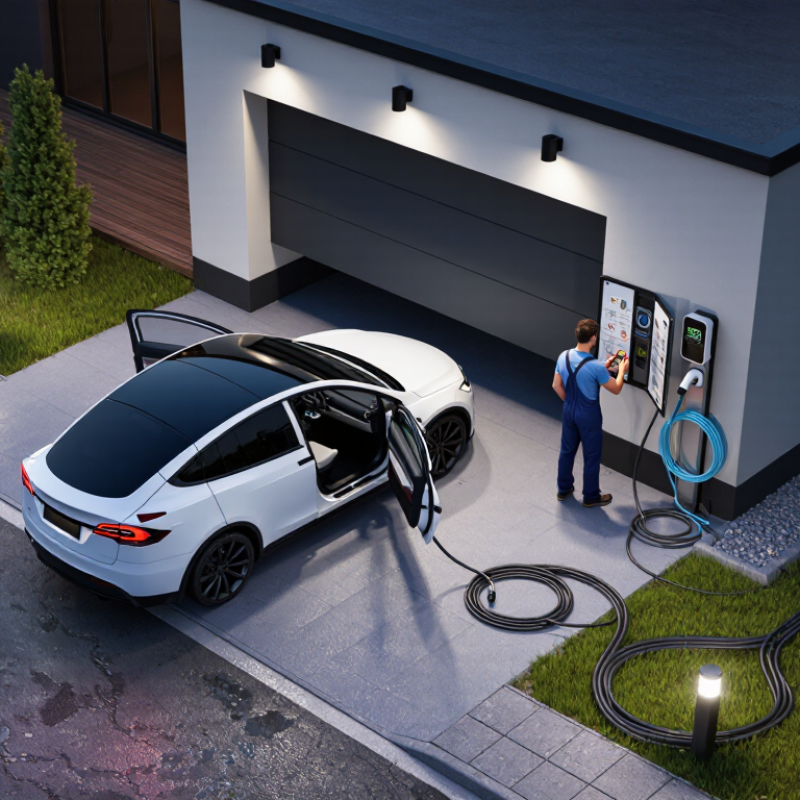
Planning an Electric Charger Installation is not simply a matter of mounting equipment beside a parking space. It is a practical electrical project that connects your vehicle, home, workplace, and local power capacity. A reliable plan begins with daily driving habits. A driver covering 30 miles each day may need a different charger than a household with two electric vehicles.
Tom Moloughney, an EV charging specialist and author, often emphasizes, “Home charging is the most convenient way to charge an electric vehicle.” That convenience depends on careful preparation. An installer should inspect the electrical panel, confirm available capacity, and calculate the correct circuit size. The cable route also matters. A charger placed too far from the panel may increase cost and installation complexity.
Small details affect long-term performance. Consider rain exposure, winter temperatures, lighting, vehicle access, and cable storage. Leave enough clearance for opening doors. Avoid locations where a cable could become a trip hazard. A qualified electrician should verify grounding, protection devices, and local approval requirements.
The cheapest location may not be the best location. That lesson is easy to overlook. Future vehicle ownership can also change the plan. A spare conduit or slightly larger installation pathway might support another charger later, although it may increase today’s expense.
This guide explains how to compare charger types, evaluate site conditions, estimate installation costs, and prepare useful questions for an installer. Some projects still reveal surprises. Honest planning leaves room for them.
Assess Your Charging Needs and Vehicle Requirements
How to Plan an Electric Charger Installation?
Assess your real charging routine before selecting equipment. Record daily mileage, parking hours, and winter driving changes. A vehicle using 0.30 kilowatt-hours per mile needs about 18 kilowatt-hours for 60 miles. Overnight charging can easily replace that energy with a suitable Level 2 unit. The U.S. Department of Energy describes Level 2 charging as typically operating between 208 and 240 volts, although actual charging speed depends on the vehicle’s onboard charger.
Check the vehicle requirements carefully. Confirm its maximum AC charging rate, connector type, battery capacity, and recommended charging limits. A powerful charger cannot force a vehicle to charge faster. It may only increase installation cost. The International Energy Agency reported nearly 14 million electric cars were sold worldwide in 2023, showing why charging needs are becoming more varied. Bigger batteries do not automatically mean better home charging.
Inspect the property, too. A licensed electrician should review the service panel, cable route, grounding, outdoor protection, and available electrical capacity. Load management may help when heating, cooking, and charging happen together. It is easy to overestimate your needs. A high-power charger may look future-proof, yet moderate overnight charging could be more practical. The IEA also reported that public charging points grew by more than 40% in 2023, but convenient public access still depends heavily on location. Plans should allow occasional long trips, not only ordinary weekdays. That distinction is often missed.
| Assessment Dimension | Typical Data or Example | Calculation or Technical Reference | Installation Planning Implication | Recommended Check |
|---|---|---|---|---|
| Daily Driving Distance | 40 miles (64 km) per day | Used to estimate the amount of energy that must be replenished overnight. | A moderate daily distance can usually be replenished during several hours of overnight charging with a residential AC charger. | Review weekday and weekend driving separately; use the highest regular daily distance for planning. |
| Vehicle Energy Consumption | 0.30 kWh per mile (18.6 kWh per 100 km) | 40 miles × 0.30 kWh/mile = 12 kWh of driving energy per day. | Energy consumption varies with speed, temperature, terrain, payload, and heating or cooling use. | Use the vehicle’s official efficiency figure as a starting point, then add a practical operating margin. |
| Charging Loss Allowance | Approximately 10% to 15% additional energy | 12 kWh × 1.10 to 1.15 = approximately 13.2 to 13.8 kWh drawn from the electrical supply. | The charger and vehicle do not transfer every unit of electricity directly into the battery. | Include charging losses when estimating electricity use, charging time, and circuit loading. |
| Required Daily Energy | Approximately 13.2 to 13.8 kWh from the electrical supply | Based on 40 miles of driving at 0.30 kWh/mile plus a 10% to 15% charging-loss allowance. | This is the minimum energy target for replacing one typical day of driving. | Increase the target if the vehicle is frequently used for long trips or consecutive high-mileage days. |
| AC Charging Power | 3.6 kW, 7.2 kW, or 11 kW nominal AC charging | Approximate charging time = energy required ÷ effective charging power. | For 13.8 kWh, charging could take about 4 hours at 3.6 kW, 2 hours at 7.2 kW, or about 1.25 hours at 11 kW before minor power reductions. | Confirm the vehicle’s maximum AC input; a higher-rated charger will not make the vehicle charge faster than its onboard charger allows. |
| Battery Capacity | 60 kWh usable battery capacity | Daily energy need of 13.8 kWh represents approximately 23% of usable battery capacity. | Most daily charging can be scheduled without charging the battery from empty to full. | Use usable capacity rather than total advertised capacity when estimating range and charging requirements. |
| Charging Schedule | 8 hours available overnight | 13.8 kWh ÷ 8 hours = approximately 1.7 kW average power needed. | A lower-power installation may meet regular overnight needs, while higher power provides more recovery after longer journeys. | Compare the available parking time with the required energy, not only with the charger’s maximum rating. |
| Electrical Supply | Single-phase residential supply, commonly 120 V or 230 V depending on location | Charging current depends on voltage and power: current ≈ power ÷ voltage. | A 7.2 kW charger requires approximately 30 A at 240 V before applying local installation rules and design margins. | Have a qualified electrician verify supply voltage, available capacity, and local electrical requirements. |
| Dedicated Circuit | Dedicated circuit sized for the charger’s continuous load | Many electrical codes require continuous loads to be designed with additional capacity; exact requirements vary by jurisdiction. | The charger may require a dedicated breaker, correctly sized conductors, disconnecting means, and suitable protective devices. | Do not share the charging circuit with general household receptacles or high-load appliances. |
| Panel Capacity | Existing panel rating and spare capacity must be verified on site | Available capacity depends on the calculated demand of the entire property, not only the main service rating. | Panel upgrades, load management, or a lower charging current may be needed when household demand is high. | Check simultaneous loads such as heating, water heating, cooking equipment, and air conditioning. |
| Cable Route and Distance | Approximate route length from distribution panel to parking location | Longer runs can increase installation cost and voltage drop; conductor size must be selected accordingly. | Outdoor routes may require conduit, weather protection, mechanical protection, and suitable burial depth where applicable. | Measure the actual route, including bends, wall penetrations, and the charger mounting position. |
| Indoor or Outdoor Location | Garage, driveway, carport, or exposed parking area | Equipment enclosure, ingress protection, temperature rating, and mounting method must suit the environment. | Outdoor installations need weather-resistant equipment and protection from impact, water, sunlight, and unauthorized access. | Confirm clearance from doors, walkways, vehicle paths, drainage areas, and combustible materials. |
| Future Charging Demand | Potential second electric vehicle or increased daily mileage | Two vehicles may require load sharing, scheduled charging, or additional service capacity. | Planning conduit space, cable capacity, and smart load management during the first installation can reduce future modification costs. | Discuss expected household vehicle changes over the next 5 to 10 years. |
| Installation Decision | Example outcome: 7.2 kW AC charging with overnight scheduling | Provides more than the approximately 13.8 kWh daily requirement within an 8-hour charging window. | Suitable when the vehicle accepts the power level and the electrical service can support the calculated continuous load. | Obtain an on-site electrical assessment and confirm compliance with all applicable local codes and permits. |
Related Posts
-
全球电动车充电器安装费用的隐秘真相与顶尖技术
-
The Future of Sustainable Home Car Charging Points: Innovating for Tomorrow's Eco-Driven Journeys
-
Unlocking the Power of Home Car Chargers for Effortless Electric Vehicle Charging
-

Challenges with Understanding Ev Charger Installation Cost for Global Buyers
-

How to Successfully Install an Electric Car Charger at Home
-
How to Choose the Best Commercial EV Charger for Your Business?